By Michael D., 4/11/2024
With the release of version 1.3.0.0, I wanted to write a quick guide on how to setup Pulselyre, since it may not be immediately intuitive. Below are three sections covering how to create an environment with virtual MIDI devices/ports, how to configure "instruments" in Pulselyre, and how to arrange those instruments in your workspace for performing.
Pulselyre is an application for recording and looping sequences of MIDI messages (mostly MIDI Note On/Off messages). It can record messages generated from the on-screen 'piano' buttons and keyboard bindings (from your QWERTY keyboard), or received from recognized external MIDI devices (such as USB MIDI controllers/keyboards). Pulselyre can send MIDI messages to any recognized MIDI device that can receive MIDI messages. Because Pulselyre only handles MIDI messages, it does not create or play any audio on its own.
If you already have external MIDI devices such as hardware synths connected to (and recognized by) your computer, then Pulselyre should be able to see and send MIDI messages to them without any additional setup. Similarly, if you already have your own Digital Audio Workstation software running with virtual MIDI devices to create sound, then Pulselyre should also be able to see and send MIDI messages to those virtual devices without any further setup. Otherwise, you will need to install additional software to create virtual MIDI devices on your computer and to translate MIDI messages into audio.
My free recommendations are:
- "loopMIDI" - Once installed and running, this small program enables you to create and delete named virtual MIDI ports on-the-fly. These ports operate as both input and output, and merely pass along MIDI messages (received on the input side) to any other software listening (to the output side).
- "VSTHost" - This program enables you to instantiate and run VSTs (virtual synthesizer and effect plugins), and then configure them to receive MIDI messages from MIDI output devices. "VSTHost" is sophisticated, but not too difficult to learn.
There are many free and paid VSTs available; two free plugins that I suggest starting with are:
Quick start instructions:
- Start by opening "loopMIDI" and creating a virtual MIDI port (or several).
- Then, open "VSTHost" and enable it to listen to your virtual MIDI port(s): open 'Devices' menu -> 'MIDI…'; hold ctrl and click to highlight all of your virtual MIDI ports; click 'Ok'.
- Add a VST plugin to the workspace: 'File' menu -> 'New Device…'; locate and open the '.vst' file.
- Configure the plugin to listen to your virtual MIDI port: Click the 'MIDI Input Filters' button on the plugin instance (left side in the middle, hover to see tooltips); select your virtual MIDI port in the list (the default behavior is to receive MIDI messages from all MIDI devices and ports); optionally, open 'Filter Settings…' and use the 'Channels' section to ignore certain channels (checked means the channel will be ignored); close the popup windows.
- Configure how the plugin sounds: click the 'Plugin Edit' button on the plugin instance (top row, third from the right, looks like a white/red dial); configure the plugin as desired (if using "Surge XT", use the patch browser to select from the included preset configurations; if using "Drum Pro", select from the instrument list).
- Repeat steps 3-5 to create as many plugin instances as you would like. Be sure to separate them by MIDI device/port and/or channel, or else multiple plugins could respond to the same MIDI messages.
Pulselyre allows you to create and save various "instruments", each configured with its own behavior to output its MIDI messages to a specific MIDI device/port and channel. Then, within the main "workspace" area, you can arrange multiple instruments in rows on screen. At first, the default instrument is configured without a MIDI output device selected and sow ill be inoperable. Within Pulselyre, open the Menu (three line 'hamburger' button) and select "Edit Instruments". You will see a list of saved instruments on the left with configuration options for the currently selected instrument on the right (along with an on-screen piano keyboard for testing). You can rename the instrument and make changes to the settings in the tabs.
The "MIDI Input" tab is for choosing an external MIDI controller/keyboard for Pulselyre to receive MIDI messages from. (Note: if you use "loopMIDI" to create virtual MIDI ports as described above, you will see those virtual ports in this list. Do not select them, as this can create a feedback loop with infinitely repeating MIDI messages. Use ctrl + click to deselect a device if necessary. To stop a a feedback loop, open "loopMIDI" from the system tray, select the affected port, and temporarily click the "Mute" button.)
The "MIDI Output" tab is for choosing a MIDI device or port to send MIDI messages to. If you followed the instructions above, then you should see any "loopMIDI" virtual ports you created in this list. Choose a device/port and channel number.
The rest of the tabs should be self-explanatory, but hover your mouse over the buttons and labels for tooltips with more information. Be sure to click the "Save" button after you have completed the configuration.
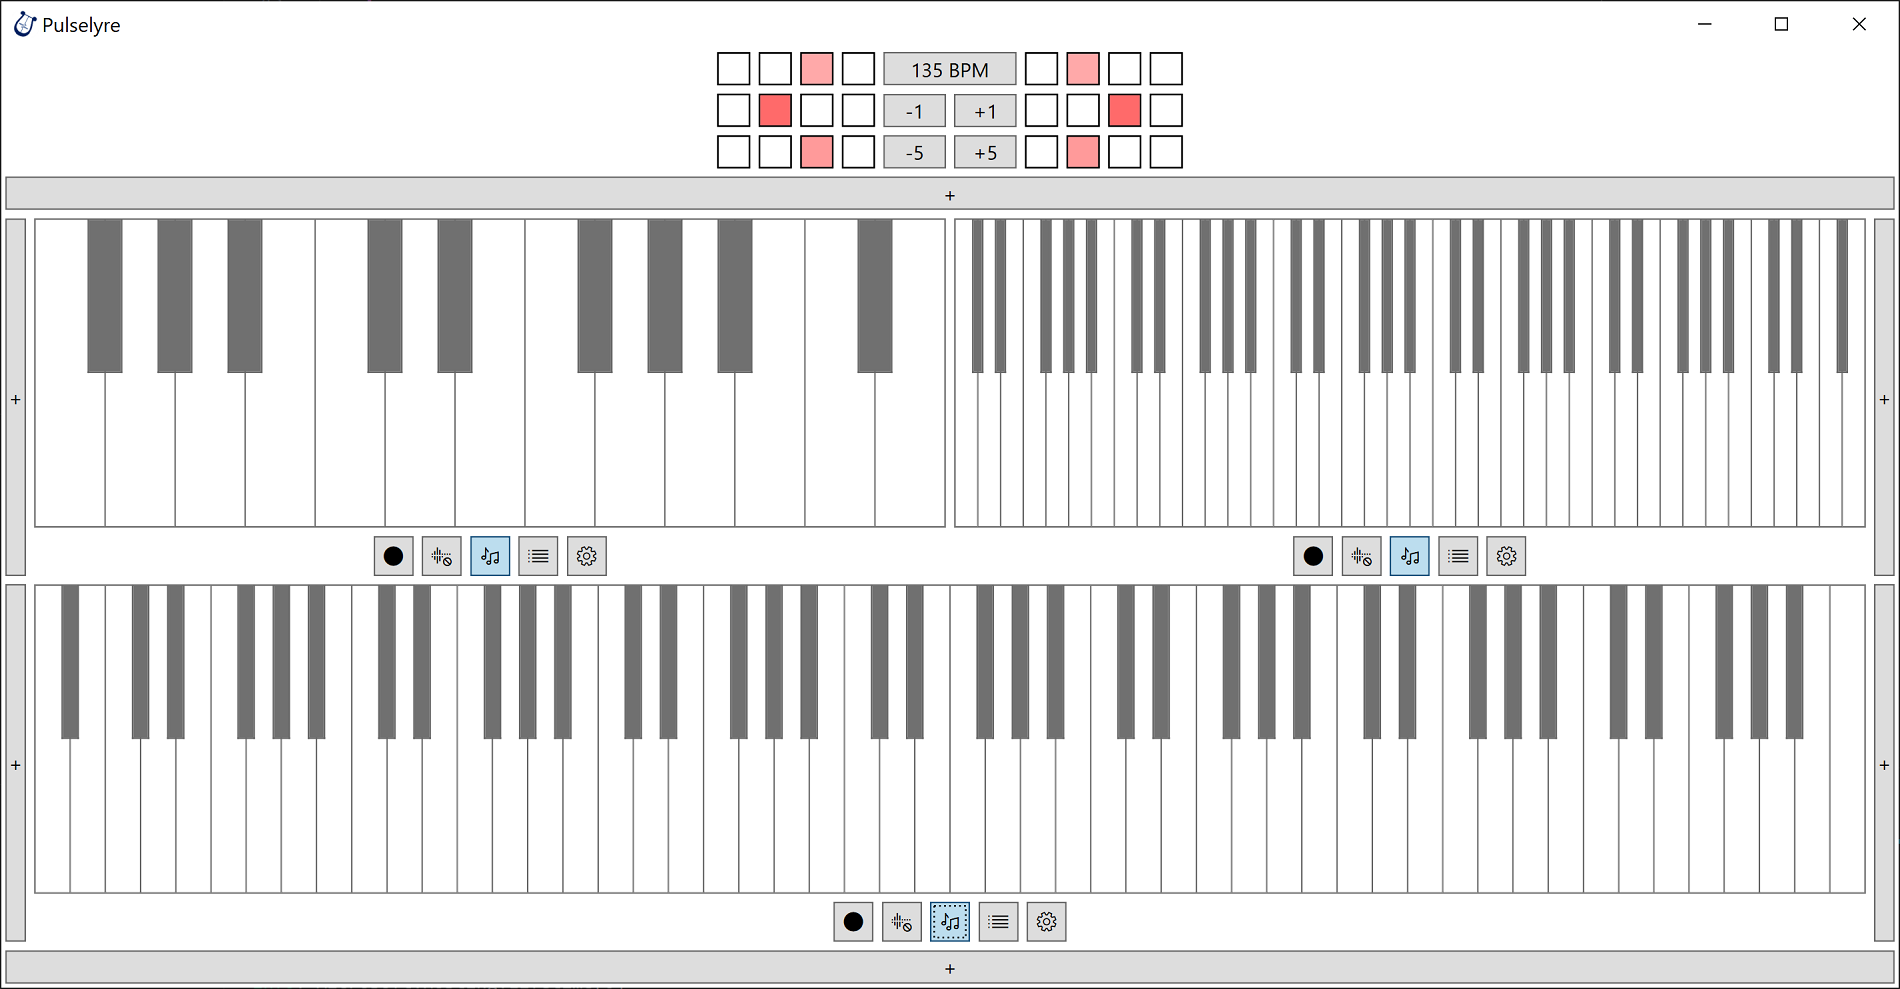
Once you have instruments configured and saved, return to the main workspace area. You can add additional instruments to the worksapce using the "+" buttons at the top and bottom of the workspace and left and right of each row. Use each instrument's "Selection Mode" button (looks like a bulleted list) to select from your saved instruments. Use the increase/decrease beats buttons to choose how many beats that instrument will loop over. The "IN" and "KB" buttons control whether the instrument is receiving inputs from its selected external MIDI controller and channel or the QWERTY keyboard, respectively. Use the "Record", "Play/Pause", "Undo", "Delete All", and "Erase After" buttons to manage recorded MIDI messages. Once you have configured the workspace to your liking, save the layout by opening the Menu (three line 'hamburger' button) and clicking the "Workspace Save" button.
I hope you enjoy using Pulselyre! Please reach out with any questions, feedback, or suggestions.
By Michael D., 2/25/2024
After a series of private beta tests, I'm excited to make Pulselyre available to the public for download. It has enough stability and capabilities that anyone should be able to use it to start making some basic music. If you give a try, any feedback, whether in the form of bug reports, feature suggestions, or general impressions, would be appreciated and invaluable.
In the coming weeks, I plan to continue adding and expanding features to control how Pulselyre creates and sends MIDI notes. Another area I intend to focus on is adding more integration options with external MIDI controllers. I also plan to record some demonstration videos showing how I configured Pulselyre to work with other audio applications. Please reach out if these ideas sound interesting to you or with any other questions, feedback, or suggestions.
By Michael D., 12/1/2023
As I’ve been making progress on the next version of Pulselyre and approaching a releasable version, I thought that this would be a good time to write up a brief backstory of how the idea came to me, the work completed so far, the current state, and what I hope to accomplish going forward.
Back in the mid-2000s, before Apple released the first version of the iPhone, there was a video produced by Jefferson Han, one of the original developers of "multi-touch sensing," floating around the internet. The video demonstrated several experimental applications using multi-touch screen technology on a large-format display.
Some of the segments showed use cases that are still common today, such as touch-based games and using your finger-tips to browse 3D maps. However, the segment starting around 2:19 stood out to me. It demonstrated what looked to be some kind of “workspace” where different audio synthesizer modules could be placed, configured, and controlled to produce music. It seemed bit too complicated and difficult to use for any kind of live performance, but I wondered if a more streamlined and intuitive version could be built.
Throughout the 2010s, I built several experimental applications to try and determine what kind of user interface would work best for producing electronic music live. I chose to develop for the Windows platform, as I thought that both phone and tablet screens would be too small. Also, of all the desktop and laptop operating systems, Windows provided the best touchscreen support (and still does to my knowledge). To implement the UI, I decided to try using Windows Presentation Foundation (WPF), which at the time was the modern and mature UI framework for Windows applications. WPF runs on the .NET Platform, so I also learned C# to write all of the underlying audio synthesizing and sequencing code. I made progress on several prototypes, but ended up throwing most of them away entirely. I eventually did settle on a concept that I thought could intuitively connect a user’s touches to creating sounds.
When COVID hit in 2020, the offices I worked in closed and, like many people, I was stuck at home for several months. Most of my job could only be done on-site though, for security reasons, so I wasn't able to be very productve remotely. Instead, I suddenly had a lot of free time to work on whatever I wanted. During those few months, I was able to make a lot of progress on the Pulselyre prototype. I settled on a final design for taking input from user touches, using those touch coordinates to produce sound (and change the sound as touches moved around the screen), and displaying useful and responsive visual feedback. Unfortunately, the the synthesizer code that I had written (which worked by generating raw waveforms and feeding them into XAudio2) paled in comparison to existing alternatives such as VSTs. Nevertheless, after adding some finishing details to improve the look, recording a rough demo video, and putting up a quick website, I released the first version of Pulselyre to the public.
I shared the first version to potential users, but received unenthusiastic feedback. They said the interface was interesting and could be fun to use, but as I expected they were dissatisfied with the underlying synthesizer's capabilities. Users would have preferred to connect the interface to VST modules that they already owned and were familiar with. One valuable suggestion did emerge from the feedback though: if the touch screen interface could be used to control MIDI devices, then that might offer a more versatile and user-friendly live musical production solution.
Work on Pulselyre slowed down as I returned to my in-office job and then moved on to other SWE positions at other companies. However, once again finding myself with a lot of free time (this time following a recent layoff), I decided to restart work on building the next version of Pulselyre. Progress so far has involved learning the basics of the MIDI protocol and determining the best method to control and configure messages based on touch inputs. I built a basic piano/keyboard control for WPF and some sequencing code that can send looping MIDI messages to start and stop notes. It’s all working pretty well and I hope to release a video and binary soon.
I plan to use this blog to explain some of the engineering and design choices I’ve made, do some deep dives into interesting code snippets, and discuss some other side-projects that split off from Pulselyre. Please reach out with any questions, feedback, or suggestions.